Fully Passwordless Authentication with Flask and Webauthn (Part 2)
Creating a user
We did a lot of important setup in Part 1. You'll be lost without it. This is where we left off with the codebase.
There are two very important items we need to save in the database. Item one is our actual user accounts. Let's create the SQLAlchemy model. This is pretty standard except that there's no password field and that I'm using UUIDs instead of exposing the database primary key. I'm using a helper function to make string UUIDs instead of PostgreSQLs native UUID type for compatibility and because I need it to be a string most of the time anyway. Usernames are required for WebAuthn, but you could simply use the email as the username if you wanted.
import uuid

from flask_sqlalchemy import SQLAlchemy

def _str_uuid():
    return str(uuid.uuid4())


class User(db.Model):
    """A user in the database"""

    id = db.Column(db.Integer, primary_key=True)
    uid = db.Column(db.String(40), default=_str_uuid, unique=True)
    username = db.Column(db.String(255), unique=True, nullable=False)
    name = db.Column(db.String(255), nullable=True)
    email = db.Column(db.String(255), unique=True, nullable=False)

    def __repr__(self):
        return f"<User {self.username}>"
Your IDE might complain about db.Column and the like being undefined because we didn't initialize the database here. It's nothing to worry about, as we'll see later. Be sure that you don't call the _str_uuid function, or it will give all the users the same uid...which will create database errors because we're enforcing uniqueness.
Each time your user registers a new device, it will send a credential to the server. We need to store that credential (specifically the id and public key) and associate it with the user, so they can use it to sign in again. This is our password replacement. The id and public key will be sent as bytes, so we can just store them in the database as binary.
# ... imports and user model ...

class WebAuthnCredential(db.Model):
    """Stored WebAuthn Credentials as a replacement for passwords."""

    id = db.Column(db.Integer, primary_key=True)
    user_id = db.Column(db.Integer, db.ForeignKey("user.id"), nullable=False)
    credential_id = db.Column(db.LargeBinary, nullable=False)
    credential_public_key = db.Column(db.LargeBinary, nullable=False)
    current_sign_count = db.Column(db.Integer, default=0)

    def __repr__(self):
        return f"<Credential {self.credential_id}>"
I've included the current_sign_count because you're supposed to track how many times a credential has been used and compare it with the client as a security measure. Unfortunately, Safari (and therefore Apple Passkeys) does not track this correctly, so we can't actually use this.
The first column on our WebAuthnCredential model is the user_id, which is just what it sounds like. This is how we associate the credential with the user. SQLAlchemy will actually handle this for us when we create a new credential. Let's update the User model, so we can get a user's credentials easily.
# ...other imports ...
from sqlalchemy.orm import backref

# ...  snip ...

class User(db.Model):
    # ... user fields ...
        credentials = db.relationship(
        "WebAuthnCredential",
        backref=backref("user", cascade="all, delete"),
        lazy=True
    )

# ... rest of models.py ...
Here we are telling the User model that it has credentials in the WebAuthnCredential model, then that there should be a user field on that model referencing this User and that if the user is deleted, it should also delete the associated credentials.
We created new database models, which means we need new migrations. We can create the migrations inside our docker container by running docker compose run --rm app sh -c 'flask db migrate -m "Create user and credential tables".

Apply the migrations by restarting the app with docker compose restart app. You should see a line in the output log with something like Running upgrade -> [some hash], Create user and credential tables.
So it's great that we can store things in the database, but our website is currently just "Hello, world!" Let's fix that.
Flask uses Jinja2 to render templates. It's super powerful and allows inheritance and partial includes. We'll start with a base template with everything we want on all the pages, then build from there.
Create a templates directory in the app directory. Then create base.html inside the templates directory. We will include the tailwind cdn distribution for demo purposes. In production, you should set it up properly according to their instructions.
<!doctype html>
<html lang="en">
<head>
  <meta charset="UTF-8">
  <meta
    name="viewport"
    content="width=device-width, user-scalable=no, initial-scale=1.0, maximum-scale=1.0, minimum-scale=1.0"
  >
  <meta http-equiv="X-UA-Compatible" content="ie=edge">
  <title>Flask WebAuthn Demo</title>

<!--  Quick and dirty tailwind to save some time on css -->
  <script src="https://cdn.tailwindcss.com"></script>
</head>
<body>

<!-- navbar -->
<header class="w-full bg-gray-50 font-bold px-8 py-2 flex justify-between shadow items-center">
  <a href="{{ url_for('index') }}" class="font-bold text-2xl">WebAuthn Flask</a>
  <nav class="flex justify-end space-x-4 items-center">
    <!-- We'll come back and fill in the actual links later -->
    <div>
      <a href="#" class="hover:underline font-bold text-xl">Login</a>
    </div>
    <div>
      <a href="#" class="hover:underline font-bold text-xl">Register</a>
    </div>
  </nav>
</header>

<!-- main content -->
<main class="mt-8 max-w-4xl mx-auto px-2" id="page-content">
  {% block content %}
  {% endblock %}
</main>

</body>
{% block script %}
{% endblock script %}
</html>
Next, we can use this base template to create a simple index page
{% extends "base.html" %}
{% block content %}
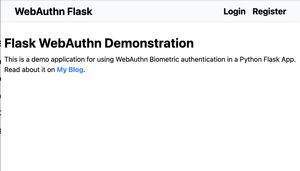
<h1 class="mb-2 font-bold text-3xl">Flask WebAuthn Demonstration</h1>
<p class="mb-2">
This is a demo application for using WebAuthn Biometric
authentication in a Python Flask App. Read about it on <a
href="https://rickhenry.dev/blog/posts/2022-06-19-flask-webauthn-demo-1"
class="font-bold text-blue-500 hover:underline"
>My Blog</a>.
</p>
{% endblock content %}Now we tell flask to render this template when someone requests the index page. You'll need to import the render_template function from flask.
import os

from flask import Flask, render_template
# ... snip ...

@app.route('/')
def index():
    """The main homepage. This is a stub since it's a demo project."""
    return render_template("index.html")
Let's check that this all works. Restart the app using docker compose restart app, then go to your ngrok url and verify that you can see the index page.
The first step in authentication is generally user registration. Let's get into it.
Let's create a Flask blueprint so that we don't just dump everything in app.py. The first version of this definitely didn't just dump everything in app.py. I would never...
Create a directory app/auth then create views.py and __init__.py. __init__.py will be empty.
from flask import Blueprint

auth = Blueprint("auth", __name__)


@auth.route("/register")
def register():
    return "Register user"


@auth.route("/login")
def login():
    return "Login user"
Import the blueprint to the main app.py file and register the blueprint on the main app object.
# ... imports ...
from auth.view import auth

# ... snip ...
app.register_blueprint(auth, url_prefix="/auth")
Also update the navbar in the base.html base template to link to our new routes.
<!--- snip -->
<!-- We'll come back and fill in the actual links later -->
<div>
  <a href="{{ url_for('auth.login') }}" class="hover:underline font-bold text-xl">Login</a>
</div>
<div>
  <a href="{{ url_for('auth.register') }}" class="hover:underline font-bold text-xl">Register</a>
</div>
<!--- snip -->
Restart the app with docker compose restart app, reload the page, and try clicking on the links in the navbar. If everything is set up correctly, you should end up at the login and register pages you just created.
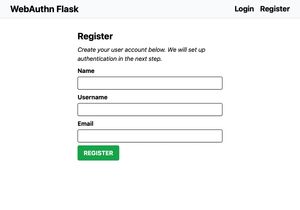
Create a templates directory in the auth directory then create an auth directory in that templates directory. Then create register.html inside. This directory structure seems odd, but makes sense with Flask's template hierarchy. There are any number of ways to create this form, but it's faster for me to just write the html manually. Probably more reusable to use a Flask library, but I'm not doing that here.
{% extends 'base.html' %}
{% block content %}
<div>
  <div class="max-w-2xl mx-auto">
    <form action="" class="flex-col max-w-sm mx-auto space-y-2">
      <h4 class="text-2xl font-bold">Register</h4>
      <p class="italic text-base">
        Create your user account below. We will set up authentication in the next
        step.
      </p>
      <div class="flex-col flex mt-2">
        <label for="name" class="mb-1 font-bold">Name</label>
        <input
            type="text"
            name="name"
            id="name"
            class="border border-black rounded shadow p-1"
        >
      </div>
      <div class="flex-col flex mt-2">
        <label for="username" class="mb-1 font-bold">Username</label>
        <input
            type="text"
            name="username"
            id="username"
            class="border border-black rounded shadow p-1"
            required
        >
      </div>
      <div class="flex-col flex mt-2">
        <label for="email" class="mb-1 font-bold">Email</label>
        <input
            type="email"
            name="email"
            id="email"
            class="border border-black rounded shadow p-1"
            required
        >
      </div>
      <div>
        <button
            class="bg-green-600 font-bold py-2 px-4 uppercase shadow text-white rounded hover:bg-green-700 hover:shadow-lg"
            type="submit"
        >
          Register
        </button>
      </div>
    </form>
  </div>
</div>
{% endblock content %}
We're leaving the form action blank for now. We'll come back and do some htmx magic once we have the server side code in place. Update the register route to render our new template (import the render_template function from flask again)
from flask import Blueprint, render_template
# ... snip ...

@app.route('/register')
def register():
    """Show the form for new users to register"""
    return render_template("auth/register.html")
Restart the app again with docker compose restart app and navigate to the register page. Our new form should be there, with the navbar we set up in base.html
Back in app/auth/views.py we will create a user in the database from the form data we just collected (we'll wire it up to the form shortly). I'm going to create a new route, but you could do it all in one route and use the request method for flow control. To get the form data, you'll need to Flask's global request object and make_response. We will also need to import our User and db from the models.py file. We will also need IntegrityError from SQLAlchemy.
from flask import Blueprint, render_template, request
from sqlalchemy.exc import IntegrityError

from models import User, db
# ... snip ...

@auth.route("/create-user", methods=["POST"])
def create_user():
    """Handle creation of new users from the user creation form."""
    name = request.form.get("name")
    username = request.form.get("username")
    email = request.form.get("email")

    user = User(name=name, username=username, email=email)
    try:
        db.session.add(user)
        db.session.commit()
    except IntegrityError:
        return make_response("Invalid form data", 400)

    return make_response("User Created", 201)
The make_response calls are temporary. We'll replace this with much nicer error handling using htmx.
Go back to the register.html template and update the form to submit to our new route. We'll also make this nicer with htmx, but we can check that our user creation is working.
<!--- snip --->
<div class="max-w-2xl mx-auto">
  <form action="{{ url_for('auth.create_user') }}"  method="POST" class="flex-col max-w-sm mx-auto space-y-2">
    <h4 class="text-2xl font-bold">Register</h4>
docker compose restart app and let's see if it works! (If you use url_for('create_user'), flask will give you a ver helpful error message suggesting that you use url_for('auth.create_user'), which I mention for no particular reason...)
Try creating a user for yourself. You should see the "User Created" text from the route. You can check that it's actually in the database by running
$ docker compose run --rm app sh -c 'flask shell'then in the Python shell that comes up, import the user model and query for all.
Python 3.10.0 (default, Oct 26 2021, 23:03:14) [GCC 10.2.1 20210110] on linux
App: app [production]
Instance: /app/instance
>>> from models import User
>>> User.query.all()
[<User rickhenry>]
Yours will obviously be whatever username you used. If you try to create another user with the same username or email, it will fail.
After these changes, the codebase now looks like this. We will pretty this up and get to the credential registration in Part 3.